Rendering can be hard, so here are Michelle Ma's tips to save your day...and night...
1. Position your camera according to your render resolution
Turn on the Resolution Gate and Gate Mask to show what gets rendered according to your render settings.
You can keyframe your camera in place once you are satisfied with the view.
Turn on the Resolution Gate and Gate Mask to show what gets rendered according to your render settings.
You can keyframe your camera in place once you are satisfied with the view.

2. Set your Project Directory
Set your project directory somewhere easy to find as this is where Maya will store your rendered images.
If you forgot to do this, you can check your current project directory in the Render Settings.
Typically, the default workspace will be in /Users/USERNAME/Documents/maya/projects/default.
Set your project directory somewhere easy to find as this is where Maya will store your rendered images.
If you forgot to do this, you can check your current project directory in the Render Settings.
Typically, the default workspace will be in /Users/USERNAME/Documents/maya/projects/default.
3. Set your Render Settings

|
All the red fields must be changed for your sequence to render correctly.
These are the:
|
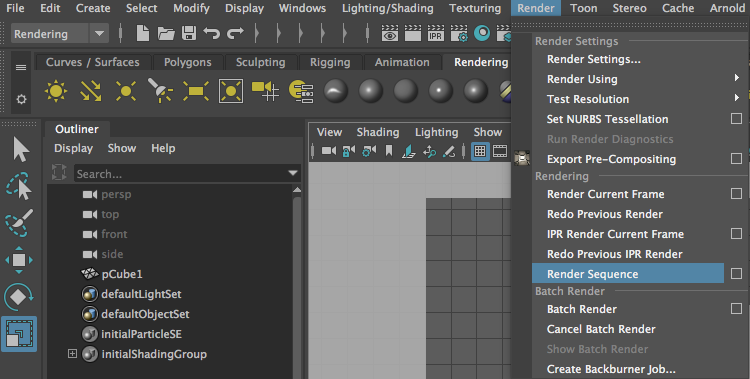
4. Render your Image Sequence
Go to the Rendering Toolset and choose Render Sequence. Do not choose Batch Render.
As your render progresses, you will see the time slider progress through your render frames.
Go to the Rendering Toolset and choose Render Sequence. Do not choose Batch Render.
As your render progresses, you will see the time slider progress through your render frames.
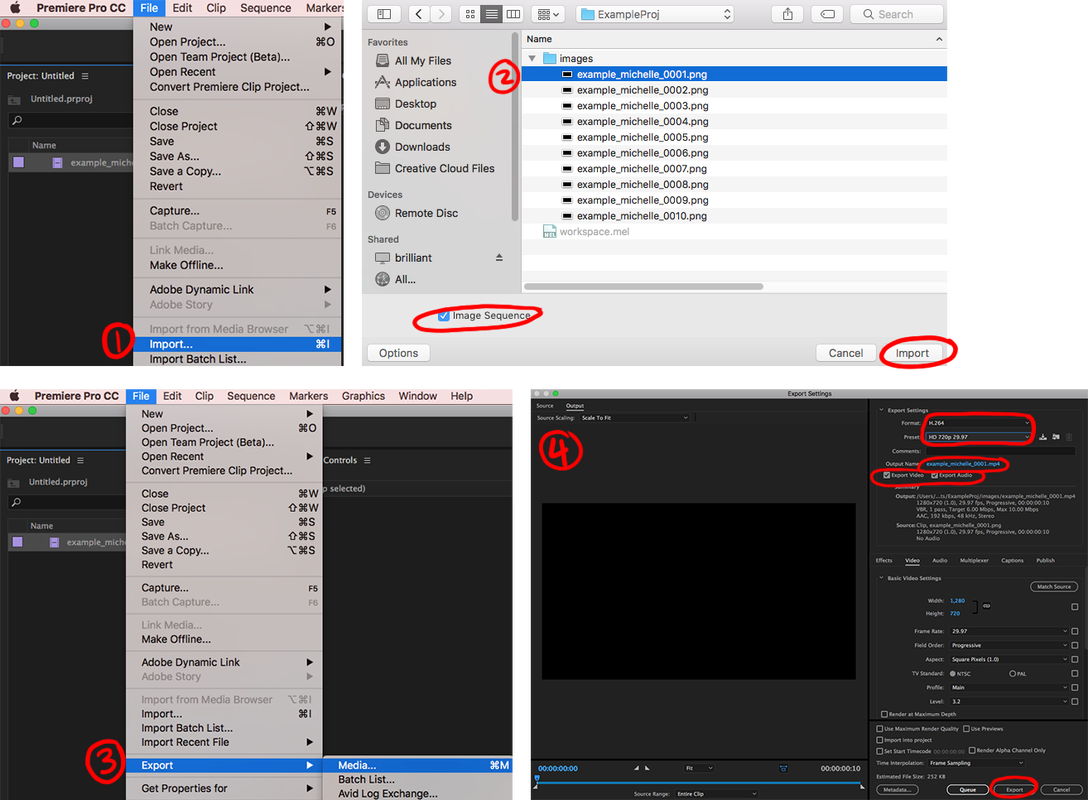
5a. Export your Image Sequence into a video using Premiere Pro CC
- Select Import from the dropdown menu.
- Select the first image from your sequence and make sure Image Sequence is checked before you import.
- Right click on your file and go to File > Export > Media...
- Select the H.264 format.
- For preset, select any HD 720p or HD 1080p that has a frame rate above 24fps.
- Choose your render directory
- Render it by pressing the export button. Your file should come out as an mp4.
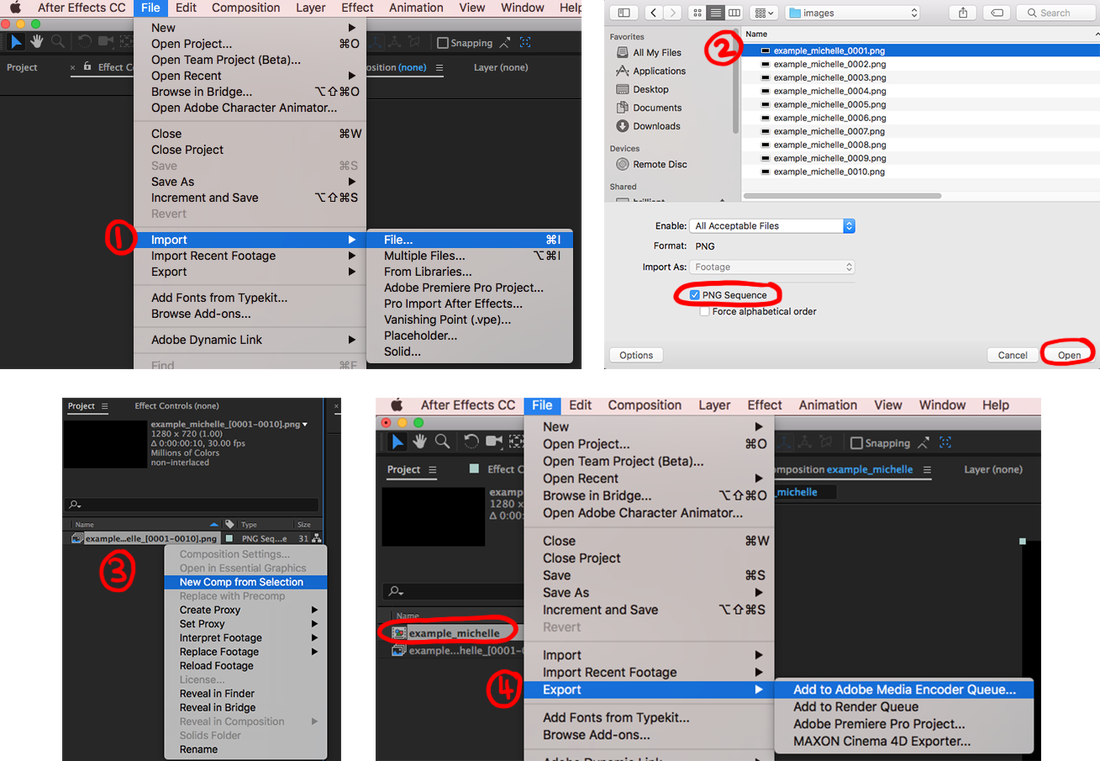
5b. Export your Image Sequence into a video using After Effects CC
If you are using After Effects CC, here's how to export your image sequence into a video:
If you are using After Effects CC, here's how to export your image sequence into a video:
- Select Import > File from the dropdown menu.
- Select the first image from your sequence and make sure PNG Sequence is checked before you import.
- Right click on your file and create a New Comp from Selection.
- Select this new composition and go to File > Export > Add to Adobe Media Encoder Queue
- Your export should appear in the Encoder. Select the H.264 preset.
- Choose your render directory
- Render it by pressing the green play button. Your file should come out as an mp4.
*Tutorial from the amazing Michelle Ma
